")
")


Recent Products
HP Color Laserjet Pro MFP 3301fdw Wireless All-in-One Color Laser Printer, Office Printer, Scanner, Copier, Fax, ADF, Duplex, Best-for-Office (499Q5F)

HP Color Laserjet Pro MFP 3301fdw Wireless All-in-One Color Laser Printer, Office Printer, Scanner, Copier, Fax, ADF, Duplex, Best-for-Office (499Q5F)
About this item FROM AMERICA’S MOST TRUSTED PRINTER BRAND – Perfect for small teams printing, scanning and copying professional-quality color documents and reports plus fax. Print speeds up to 26 ppm black/color. PROFESSIONAL PRODUCTIVITY – Proficiency with every print—next-generation TerraJet toner brings your business to life with more vivid colors UPGRADED FEATURES – Fast color printing, scan, copy, fax, auto 2-sided printing, 2-sided single-pass scanning, auto document feeder, and a 250-sheet input tray. AWARD-WINNING RELIABILITY – Performance you can count on page after page, and always ready for the high demands of business. WIRELESS PRINTING – Stay connected with dual-band Wi-Fi with self-reset, which automatically detects and resolves connection issues. PROTECTS YOUR DATA – Built-in HP Wolf Pro Security uses a powerful suite of customizable tools that boosts security and helps keep networks protected against cyber threats and malware. HP APP – Print, scan, copy, or fax right from your smartphone with the easiest-to-use print app.
SUSTAINABLE DESIGN – Decrease your carbon footprint with a printer and toner cartridges built to reduce plastic use and energy consumption. The 3301fdw is Energy Star and EPEAT certified. Recycle your toner cartridges with HP Planet Partners. This printer is intended to work only with cartridges with original HP chips or circuitry and will block cartridges using non-HP chips or circuitry. Periodic firmware updates will maintain the effectiveness of these measures. Media sizes supported: Letter; Legal; Executive; Oficio 8.5 x 13; 4 x 6 in; 5 x 8 in; Envelope #10; Envelope Monarch; A4; A5; A6; B5 (JIS); B6 (JIS); 10 x 15 cm; Oficio 216 x 340 mm; 16K 195 x 270 mm; 16K 184 x 260 mm; 16K 197 x 273 mm; Postcard (JIS); Envelope B5; Envelope C5; Envelope DL; A5-R; Media sizes, custom: 3 x 5 in to 8.5 x 14 in. Show more › See more product details
HP LaserJet M209dw Wireless Printer, Print, Fast speeds, Easy setup, Mobile printing,Best-for-small teams

HP LaserJet M209dw Wireless Printer, Print, Fast speeds, Easy setup, Mobile printing,Best-for-small teams
About this item FROM AMERICA’S MOST TRUSTED PRINTER BRAND – Perfect for small teams printing black & white documents and reports, plus auto two-sided printing. Perfect for 1-5 people. FASTEST TWO-SIDED PRINTING IN ITS CLASS – Up to 30 black-and-white pages per minute single-sided, up to 19 black-and-white pages per minute two-sided DUAL-BAND WI-FI WITH SELF-RESET – Automatically detects and resolves connectivity issues STRONG SECURITY – Built-in security features help protect your printer from potential attacks PRINT FROM ANY DEVICE – Wireless printing from any mobile device, PC or tablet. Ethernet included. Works with Microsoft, Mac, AirPrint, Android, Chromebook and more. HP SMART APP – Eliminate steps in repetitive tasks, scan to the cloud and print or copy from your smartphone using HP Smart app This printer is intended to work only with cartridges with original HP chips or circuitry and will block cartridges using non-HP chips or circuitry. Periodic firmware updates will maintain the effectiveness of these measures.
› See more product details
HP LaserJet MFP M234dw Wireless Printer, Print, scan, copy, Fast speeds, Easy setup,(6GW99F) (6GW99F#BGJ) Mobile printing, Best for small teams

HP LaserJet MFP M234dw Wireless Printer, Print, scan, copy, Fast speeds, Easy setup,(6GW99F) (6GW99F#BGJ) Mobile printing, Best for small teams
About this item FROM AMERICA’S MOST TRUSTED PRINTER BRAND – Perfect for small teams printing, scanning and copying professional-quality black & white documents and reports. Perfect for 1-5 people. FASTEST TWO-SIDED PRINTING IN ITS CLASS – Up to 30 black-and-white pages per minute single-sided, up to 19 black-and-white pages per minute two-sided DUAL-BAND WI-FI WITH SELF-RESET – Automatically detects and resolves connectivity issues STRONG SECURITY – Built-in security features help protect your printer from potential attacks PRINT FROM ANY DEVICE – Wireless printing from any mobile device, PC or tablet. Ethernet included. Works with Microsoft, Mac, AirPrint, Android, Chromebook and more. HP SMART APP – Eliminate steps in repetitive tasks, scan to the cloud and print or copy from your smartphone using HP Smart app This printer is intended to work only with cartridges with original HP chips or circuitry and will block cartridges using non-HP chips or circuitry. Periodic firmware updates will maintain the effectiveness of these measures
› See more product details
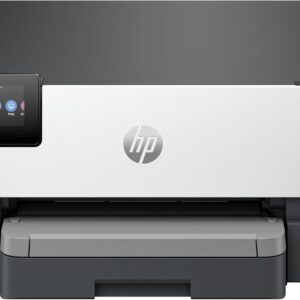
HP LaserJet Pro 4001dw Wireless Black & White Printer, Best-for-Office (2Z601F)

HP LaserJet Pro 4001dw Wireless Black & White Printer, Best-for-Office (2Z601F)
About this item 1. FROM AMERICA’S MOST TRUSTED PRINTER BRAND – Perfect for small teams printing professional-quality black & white documents and reports plus auto 2-sided printing. Perfect for up to 10 people. 2. BLAZING FAST PRINT SPEEDS – Up to 42 black-and-white pages per minute single-sided 3. STAYS CONNECTED – Intelligent Wi-Fi looks for the best connection to stay online and ready to print 4. PROTECTS YOUR DATA – Includes HP Wolf Pro Security with customizable settings so your printer and information are always secure 5. PRINT FROM ANY DEVICE – Wireless printing from any mobile device, PC or tablet. Ethernet and Bluetooth included. Works with Microsoft, Mac, AirPrint, Android, Chromebook and more. This printer is intended to work only with cartridges with original HP chips or circuitry and will block cartridges using non-HP chips or circuitry. Periodic firmware updates will maintain the effectiveness of these measures. More at www. hp .com/learn/ds. Dynamic Security messaging
› See more product details
HP LaserJet Pro MFP 3101fdw Wireless Black & White All-in-One Laser Printer, Scanner, Copier, Fax, Best-for-Office (3G628F)

HP LaserJet Pro MFP 3101fdw Wireless Black & White All-in-One Laser Printer, Scanner, Copier, Fax, Best-for-Office (3G628F)
About this item EVERYTHING SMALL TEAMS NEED – Print, scan and copy professional-quality black & white documents and reports plus fax. Auto 2-sided printing and auto document feeder for fast scan/copy. Perfect for up to 7 people. SUPER-FAST PRINT SPEEDS – Up to 35 black-and-white pages per minute single-sided STAYS CONNECTED – Intelligent Wi-Fi looks for the best connection to stay online and ready to print PROTECTS YOUR DATA – Includes HP Wolf Pro Security with customizable settings so your printer and information are always secure PRINT FROM ANY DEVICE – Wireless printing from any mobile device, PC or tablet. Ethernet and Bluetooth included. Works with Microsoft, Mac, AirPrint, Android, Chromebook and more. This printer is intended to work only with cartridges with original HP chips or circuitry and will block cartridges using non-HP chips or circuitry. Periodic firmware updates will maintain the effectiveness of these measures. Never run out of ink. Connect your printer to Alexa and receive notifications when you’re running low. Alexa can even place a smart reorder from Amazon on your behalf. Use Alexa to print things like shopping lists and crosswords all with your voice.
› See more product details
HP OfficeJet 250 All-in-One Portable Printer with Wireless & Mobile Printing, Works with Alexa (CZ992A) Black

HP OfficeJet 250 All-in-One Portable Printer with Wireless & Mobile Printing, Works with Alexa (CZ992A) Black
About this item Main functions of this HP all-in-one portable printer: scan, copy, easy portable printing wherever you need it, wireless Print from your laptop or mobile devices, 2. 65″ Color touchscreen, auto document feeder, and more Mobile printing: print from anywhere using your smartphone or tablet with the free HP ePrint app, easily connect to your printer with Bluetooth smart technology and Wi-Fi Direct Easy portable printing wherever you need it. This durable, compact printer fits in your car, backpack, and more, for convenient printing anywhere. Start printing right out of the box with quick and easy setup Reduce charging interruptions with a long-lasting battery. Charge from home, in your car or office, and more. Plug in your AC power source to charge within 90 minutes while the printer is off Use Original HP 62 ink & HP 62XL cartridges for great results Print after print. Original HP ink prints up to 2x the pages as refilled cartridges Use the 2. 65-Inch color touchscreen to print, scan and copy quickly and easily. Quickly print, copy, and scan multipage documents hands-free with the 10-page automatic document feeder Paper sizes supported: Letter, legal, statement, executive, envelopes (no. 10, Monarch, 6 3/4 in), cards (3×5 in, 4×6 in, 5×8 in), photo (8×10 in, 5×7 in, 4×6 in, 3. 5×5 in) One-year limited hardware backed by HP customer care, service and support; one-year TECHNICAL Phone Support
› See more product details
HP OfficeJet Pro 9110b Wireless Color Inkjet Printer, Print, Duplex Printing Best-for-Office (5A0S1A)
HP OfficeJet Pro 9110b Wireless Color Inkjet Printer, Print, Duplex Printing Best-for-Office (5A0S1A)
About this item FROM AMERICA’S MOST TRUSTED PRINTER BRAND – The OfficeJet Pro 9110b is perfect for offices printing professional-quality color documents like presentations, brochures and flyers. Print speeds up to 18 ppm color, 22 ppm black. Great for remote teams. UPGRADED FEATURES – Fast color printing, auto 2-sided printing, and a 250-sheet input tray WIRELESS PRINTING – Stay connected with our most reliable dual-band Wi-Fi, which automatically detects and resolves connection issues HP UNIVERSAL PRINT DRIVER – Quickly set up, integrate and manage printers with this one-driver solution PROTECTS YOUR DATA – Built-in HP Wolf Pro Security uses a powerful suite of customizable tools that boosts security and helps keep networks protected against cyber threats and malware ADVANCED PAGE DESCRIPTION LANGUAGE – Interprets and translates digital files so printed outputs match the original digital representation HP WEB JETADMIN – Easily configure, manage and fix your printers all in one place
SUSTAINABLE DESIGN – Made with more than 40% recycled plastic This printer is intended to work only with cartridges This printer is intended to work only with cartridges with original HP chips or circuitry and will block cartridges using non-HP chips or circuitry. Periodic firmware updates will maintain the effectiveness of these measures. More at www. hp .com/learn/ds. Dynamic Security messaging Show more › See more product details
-
Brother Printers, Printers & Supplies
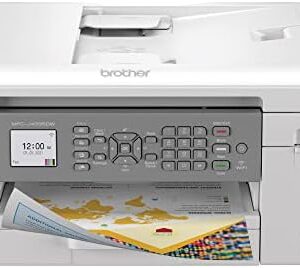
Brother MFC-J1205W INKvestment -Tank Wireless Multi-Function Color Inkjet Printer with Up to 1-Year in Box, Works with Alexa : Office Products
 Brother Printers, Printers & Supplies
Brother MFC-J1205W INKvestment -Tank Wireless Multi-Function Color Inkjet Printer with Up to 1-Year in Box, Works with Alexa : Office Products
About this item INKvest in a printer you won’t want to replace with up to 1-year of ink in-box. Print more with up to 1-year of ink, using only the 4 cartridges provided in-box. The most affordable Brother INKvestment Tank color inkjet printer available..Wireless, Wireless Direct, and USB connectivityMobile Compatibility : AirPrint, Wireless Direct, Brother Mobile Connect, Mopria The Brother Mobile Connect App puts the power of printing at your fingertips. Go mobile with the simple to use Brother Mobile Connect App that delivers easy onscreen menu navigation for printing, copying, scanning, and device management from your mobile device. Compact design fits in nearly any workspace. Its compact, desktop footprint makes the INKvestment Tank multi-function color inkjet printer a welcome addition to any home or home office space. Revolutionary INKvestment Tank Technology. The INKvestment Tank’s internal ink tank works with INKvestment Tank ink cartridges to deliver more pages of convenient, worry-free printing without sacrificing the compact, desktop size. Brother INKvestment Tank ink cartridges. Easy-to-use INKvestment Tank ink cartridges hold more ink than traditional cartridges to continually supply ink to the internal tank, so you get more pages without needing to refill. When refilling is needed, simply take out the empty cartridge, plug-in a replacement and get back to printing with no waiting and no mess. Connect your way. Choose from versatile connection options including built-in wireless, Wireless Direct or connect locally to a single computer via USB interface. Works with Alexa; add voice control by combining with an Alexa device. Page Gauge empowers you to print with confidence. Eliminate the guesswork of ink replacement when you use the Brother Mobile Connect App to access Page Gauge, so you know the amount of ink you’ve used and the amount of ink you have remaining.
Wireless printing and scanning capabilities. Print and scan wirelessly from your desktop, laptop, smartphone and tablet. Use Brother Genuine INKvestment Tank cartridges. A full range of color and black INKvestment Tank replacement ink cartridges is available that deliver high quality prints, reliable page yields and exceptional value. Brother At Your Side. Brother offers a 2-Year Limited Warranty and At Your Side support for the life of your printer. Show more › See more product detailsSKU: B092YXNZT6 -
Brother Printers, Printers & Supplies
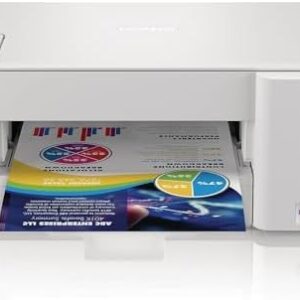
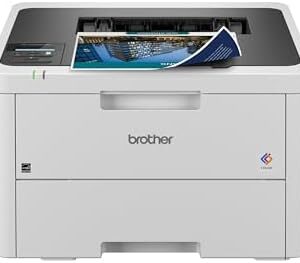
Brother Color Laser Printer with Wireless Printing Fast 19 PPM Output, Duplex Feature, Mobile Device Compatible, 250-Sheet Paper Tray for Professional Home Office Printing (HL-L3220CDW)
 Brother Printers, Printers & Supplies
Brother Color Laser Printer with Wireless Printing Fast 19 PPM Output, Duplex Feature, Mobile Device Compatible, 250-Sheet Paper Tray for Professional Home Office Printing (HL-L3220CDW)
About this item Professional Quality: Brother Genuine color laser printer delivers stunning business documents with crisp text and vibrant graphics at impressive 19 PPM speed, transforming your home office into a powerhouse of productivity Wireless Connectivity: Brother Genuine advanced wireless capabilities enable seamless printing from laptops, smartphones, and tablets, with built-in security protocols safeguarding your sensitive business documents High-Volume Capacity: Brother Genuine laser printer includes a generous 250-sheet paper tray minimizing refills, while the manual feed slot offers versatility for envelopes and specialty media Efficient Performance: Brother Genuine automatic duplex printing saves time and paper, while delivering professional-quality double-sided documents at speeds up to 19 pages per minute Mobile Integration: Brother Genuine technology ensures seamless compatibility with major mobile printing platforms and cloud services, enabling effortless document printing from your preferred devices
› See more product detailsSKU: B0CFCYYZLM -
Brother Printers, Printers & Supplies
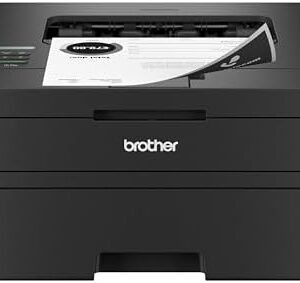
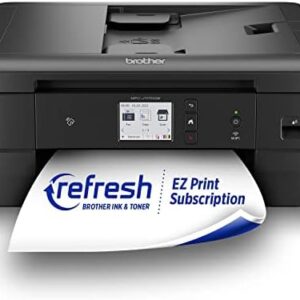
Brother HL-L2460DW Wireless Compact Monochrome Laser Printer with Duplex, Mobile Printing, Black & White Output | Includes Refresh Subscription Trial(1), Works with Alexa
 Brother Printers, Printers & Supplies
Brother HL-L2460DW Wireless Compact Monochrome Laser Printer with Duplex, Mobile Printing, Black & White Output | Includes Refresh Subscription Trial(1), Works with Alexa
About this item BEST FOR HOME OFFICES & SMALL TEAMS – Engineered for consistent, premium print quality, the Brother HL-L2460DW Monochrome (Black & White) Laser Printer produces documents that are clear, crisp, and easy to review and share, all at an affordable price COMPACT, CONNECTED, EXCEPTIONALLY EFFICIENT– Connect with built-in dual-band wireless (2.4GHz/5GHz), Ethernet, or to a single computer via USB interface. Prints at speeds up to 36ppm(2), plus automatic duplex printing saves time and reduces paper waste BROTHER MOBILE CONNECT APP – Manage your wireless printer remotely and print from your mobile device anytime, from almost anywhere. Order Brother Genuine Supplies, track toner usage, and complete more work on-the-go(3) VERSATILE PAPER HANDLING – Tackle high-volume black & white printing with the 250-sheet capacity paper tray.(4) The manual feed slot enables printing on envelopes and specialty paper BROTHER IS AT YOUR SIDE – Backed by Brother with a 1-year limited warranty and free online, call, or live chat support for the life of your printer CHOOSE BROTHER GENUINE TONER – When it’s time to replace your toner, be sure to choose Brother Genuine TN830 or TN830XL replacement toner. And with Refresh EZ Print Subscription Service, you’ll never worry about running out of toner again and you’ll enjoy savings of up to 50%(5) on Brother Genuine Toner. Get started with Refresh today with a Free Trial(1)
› See more product detailsSKU: B0CPL2N5H6 -
Brother Printers, Printers & Supplies
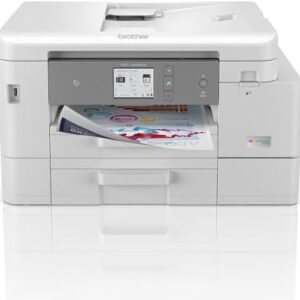
Brother MFC-J4535DW INKvestment -Tank All-in-One Color Inkjet Printer with NFC, Duplex and Wireless Printing Plus Up to 1-Year of Ink in-Box, White : Office Products
 Brother Printers, Printers & Supplies
Brother MFC-J4535DW INKvestment -Tank All-in-One Color Inkjet Printer with NFC, Duplex and Wireless Printing Plus Up to 1-Year of Ink in-Box, White : Office Products
About this item UP TO 1-YEAR OF INK IN-BOX¹ – Experience uninterrupted printing and significant cost savings with enough ink included for up to 1 year. REVOLUTIONARY INKVESTMENT TANK SYSTEM – High-yield cartridges work with the internal tank to deliver continuous ink supply without messy refills. VERSATILE CONNECTION OPTIONS – Supports dual-band wireless, Wi-Fi Direct, Ethernet, USB, and NFC one-touch mobile printing for flexible connectivity. LARGE 400-SHEET PAPER CAPACITY – Features a 400-sheet input tray for fewer reloads and smooth operation during large print jobs. EASY MOBILE & CLOUD MANAGEMENT – Print and scan from anywhere with the Brother Mobile Connect App²; manage devices and jobs effortlessly. SMART INK MANAGEMENT WITH ALEXA – Works with Alexa for low-ink alerts and optional automatic ink reordering so you’re always ready to print.
› See more product detailsSKU: B092ZF79KM -
Brother Printers, Printers & Supplies
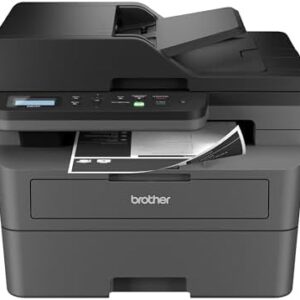
Brother DCP-L2640DW Wireless Compact Monochrome Multi-Function Laser Printer with Copy and Scan, Duplex, Mobile, Black & White | Includes Refresh Subscription Trial(1), Works with Alexa
 Brother Printers, Printers & Supplies
Brother DCP-L2640DW Wireless Compact Monochrome Multi-Function Laser Printer with Copy and Scan, Duplex, Mobile, Black & White | Includes Refresh Subscription Trial(1), Works with Alexa
About this item BEST FOR SMALL BUSINESSES – Engineered for extraordinary productivity, the Brother DCP-L2640DW Monochrome (Black & White) 3-in-1 combines laser printer, scanner, copier in one compact footprint and delivers high-quality black & white prints FAST PRINTER WITH EFFICIENT SCANNING – Produces documents quickly with print speeds up to 36 ppm(2) and scan speeds up to 23.6/7.9 ipm(3) (black/color). A 50-page auto document feeder(4) allows for convenient, time saving multi-page scanning and copying FLEXIBLE CONNECTION OPTIONS – Easily navigate the changing demands of your business with secure multi-device connectivity via built-in dual-band wireless (2.4GHz / 5GHz) and Ethernet. Or connect locally to a single computer via USB interface BROTHER MOBILE CONNECT APP – Print, scan, and manage your wireless printer anytime, from almost anywhere from your mobile device. Order Brother Genuine Supplies, track toner usage, and complete more work on-the-go(5) CHOOSE BROTHER GENUINE TONER – When it’s time to replace your toner, be sure to choose Brother Genuine TN830 or TN830XL replacement toner. And with Refresh EZ Print Subscription Service, you’ll never worry about running out of toner again and you’ll enjoy savings of up to 50%(6) on Brother Genuine Toner. Get started with Refresh today with a Free Trial(1)
› See more product detailsSKU: B0CPLFTPCV -
Brother Printers, Printers & Supplies
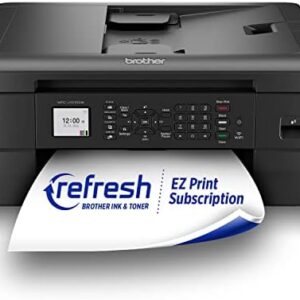
Brother MFC-J1010DW Wireless Color Inkjet All-in-One Printer, Duplex Printing, Mobile & Cloud Print, Compact Design, 1.8″ Color Display, Works with Alexa : Office Products
 Brother Printers, Printers & Supplies
Brother MFC-J1010DW Wireless Color Inkjet All-in-One Printer, Duplex Printing, Mobile & Cloud Print, Compact Design, 1.8″ Color Display, Works with Alexa : Office Products
About this item FULL FUNCTIONALITY IN A COMPACT SIZE – Print, copy, scan, and fax with business-level features in a small, budget-friendly design. FAST PRINTING WITH DUPLEX CAPABILITY – Print up to 17 ppm black and 9.5 ppm color¹ plus automatic two-sided printing to save paper and time. MOBILE AND CLOUD READY – Use Brother Mobile Connect App² to manage printing and scanning or connect directly to cloud services³. VERSATILE PAPER HANDLING – Features a 20-page automatic document feeder and a 150-sheet adjustable paper tray for less frequent refilling. 1.8″ COLOR DISPLAY FOR EASY NAVIGATION – Simple, clear screen to control functions, check status, and manage print jobs. ALEXA-ENABLED FOR SMART INK MANAGEMENT – Works with Alexa for ink level alerts and optional automatic reordering.
› See more product detailsSKU: B09WZBZ1JQ -
Brother Printers, Printers & Supplies
Brother MFC-J4335DW INKvestment Tank Wireless All-in-One Color Inkjet Printer, Up to 1-Year of Ink in-Box, Duplex Printing, Mobile and Cloud Print, Works with Alexa : Office Products
 Brother Printers, Printers & Supplies
Brother MFC-J4335DW INKvestment Tank Wireless All-in-One Color Inkjet Printer, Up to 1-Year of Ink in-Box, Duplex Printing, Mobile and Cloud Print, Works with Alexa : Office Products
About this item UP TO 1-YEAR OF INK IN-BOX¹ – Enjoy exceptional convenience and savings with enough ink for up to 1 year of printing right out of the box¹. REVOLUTIONARY INKVESTMENT TANK TECHNOLOGY – Internal ink tank system works with front-loading cartridges for hassle-free, uninterrupted printing with no manual refills. COMPACT ALL-IN-ONE FUNCTIONALITY – Print, copy, scan, and fax with fast speeds, duplex printing, and a 20-page automatic document feeder. WIRELESS AND CLOUD READY – Print-from and scan-to popular cloud services and mobile devices via the Brother Mobile Connect App³. VERSATILE PAPER HANDLING – Features a 150-sheet adjustable paper tray, bypass tray, and automatic duplex printing for letter and legal-size paper. ALEXA-ENABLED SMART REORDERING – Connect to Alexa for ink level alerts and optional smart reordering to never run out of ink unexpectedly.
› See more product detailsSKU: B092YN1JK5 -
Brother Printers, Printers & Supplies
Brother MFC-J1170DW Wireless Color Inkjet All-in-One Printer, NFC One-Touch Print, Duplex, Cloud Print & Scan, Mobile App Control, 2.7″ Touchscreen, Works with Alexa : Office Products
 Brother Printers, Printers & Supplies
Brother MFC-J1170DW Wireless Color Inkjet All-in-One Printer, NFC One-Touch Print, Duplex, Cloud Print & Scan, Mobile App Control, 2.7″ Touchscreen, Works with Alexa : Office Products
About this item DELIVERING FULL FUNCTIONALITY. There’s no sacrificing features with this compact addition to any home, home office or small office space. This inkjet all-in-one delivers full functionality, versatile paper handling plus fast print and scan speeds PUT THE POWER OF PRINTING AT YOUR FINGERTIPS: The simple to use Brother Mobile Connect(1) App delivers easy onscreen menu navigation for printing, copying, scanning and printer management from your mobile device GENEROUS 2.7 INCH COLOR TOUCHSCREEN. Easy-to-read, color touchscreen display enables simple, intuitive navigation to powerful features plus print-from and scan-to popular cloud services(5) directly from the printer WORRY-FREE PRINTING USING PAGE GAUGE(2).Eliminate the guesswork of ink replacement when you use the Brother Mobile Connect(1) App to access Page Gauge, so you know the amount of ink you’ve used and the amount of ink you have remaining(2) USE ONLY BROTHER GENUINE INK: A full range of Brother Genuine ink cartridges deliver high quality prints and reliable page yields. Choose from Standard (LC401 Series) or High Yield (LC401XL Series) cartridges including select multi-pack options
› See more product detailsSKU: B09WZBX4Z1 -
Canon Printers, Printer drivers, Printers & Supplies
Canon PIXMA TR7020a All-in-One Wireless Color Inkjet Printer, with Duplex Printing, Mobile Printing, and Auto Document Feeder, Black, Works with Alexa
 Canon Printers, Printer drivers, Printers & Supplies
Canon PIXMA TR7020a All-in-One Wireless Color Inkjet Printer, with Duplex Printing, Mobile Printing, and Auto Document Feeder, Black, Works with Alexa
About this item Sold as 1 Each. All-in-one convenience from Canon print, copy, and scan effortlessly with the Canon PIXMA TR7020a Wireless Color All-in-One Inkjet Printer.. Stay connected with versatile USB and Wi-Fi printing options, suitable for both home and office environments.. Intuitive 1.44″ display for simple setup and navigation through all your printing needs.. Flexible paper feeding options with front and rear trays, allowing for simultaneous plain paper loading and easy media switching.. Compatible with the Canon PIXMA Print Plan Ink Subscription Service – Flexible plans available where ink is delivered hassle-free right to your door automatically when you run low! *. Compact design with dimensions of 8.2″H x 14.4″W x 15.9″D enhances productivity without taking up too much space. Superior scanning quality with 1200 x 2400 dpi optical resolution, and 8-bit color depth, ideal for capturing detailed text and images. High-quality, vibrant prints with impressive 4800 DPI resolution, perfect for professional documents and photos.. Versatile media support, handle everything from glossy photo paper to cards, envelopes, and even magnetic photo paper.. Energy-efficient and environmentally friendly, the Canon PIXMA TR7020a meets ENERGY STAR standards.. Backed by a 1-year manufacturer limited warranty for peace of mind and protection for your investment.. Enjoy efficient printing with color print speed up to 6.8 IPM and black white up to 13 IPM, alongside automatic double-sided printing for letter-sized documents.. Save paper and time with automatic double-sided printing, creating streamlined two-sided documents with ease.. Stylish and adaptable, this black printer blends seamlessly with your home or office workspace.. * Failure to connect your PIXMA Printer to the Internet will impact Canon’s ability to ship PIXMA Print Plan Cartridge(s) on a
› See more product detailsSKU: B09TGB62D8 -
Canon Printers, Printer drivers, Printers & Supplies
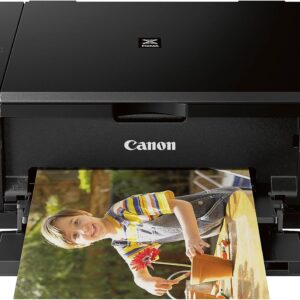
Canon Pixma MG3620 Wireless All-in-One Color Inkjet Printer with Mobile and Tablet Printing, Black
 Canon Printers, Printer drivers, Printers & Supplies
Canon Pixma MG3620 Wireless All-in-One Color Inkjet Printer with Mobile and Tablet Printing, Black
About this item Wireless 3-in-1 (print | copy | scan) Easily print and scan photos and documents directly from your mobile devices. 9.9 / 5.7 ipm print speed 100 sheet capacity Auto 2-sided printing ENERGY STAR Compact, space-saving design.
Never run out of ink or toner. Connect your printer to Alexa and receive notifications when you’re running low. Alexa can even place a smart reorder from Amazon on your behalf, if you enroll in smart reorders. Enrolling in smart reorders with Alexa ensure that you never have too much or too little ink or toner. No subscription needed. Show more › See more product detailsSKU: B010A7TZ76 -
Canon Printers, Printer drivers, Printers & Supplies
Canon PIXMA TS6420a All-in-One Wireless Inkjet Printer [Print,Copy,Scan], Black, Works with Alexa
![Canon PIXMA TS6420a All-in-One Wireless Inkjet Printer [Print,Copy,Scan], Black, Works with Alexa](https://onepromax.store/wp-content/uploads/2025/02/61x6KTFR8yL._AC_SL1500_-2-300x300.jpg) Canon Printers, Printer drivers, Printers & Supplies
Canon Printers, Printer drivers, Printers & SuppliesCanon PIXMA TS6420a All-in-One Wireless Inkjet Printer [Print,Copy,Scan], Black, Works with Alexa
About this item Sold as 1 Each All-in-one printer gives you printing, copying, and scanning capability Compatible with the Canon PIXMA Print Plan Ink Subscription Service – Flexible plans available where ink is delivered hassle-free right to your door automatically when you run low! * Printer has a resolution quality that goes up to 4800 x 1200 dpi for excellent readability Capable of auto two-sided (duplex) printing for documents
› See more product detailsSKU: B09TG52XT4 -
Canon Printers, Printer drivers, Printers & Supplies
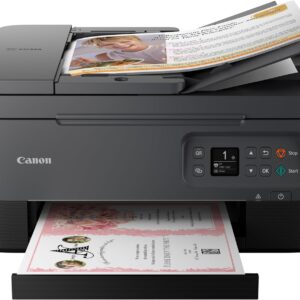
Canon PIXMA TR4720 All-in-One Wireless Printer, Home Use with Auto Document Feeder, Mobile Printing and Built-in Fax, Black
 Canon Printers, Printer drivers, Printers & Supplies
Canon PIXMA TR4720 All-in-One Wireless Printer, Home Use with Auto Document Feeder, Mobile Printing and Built-in Fax, Black
About this item Wireless 4-in-1 (print | copy | scan | fax)..Power Consumption: 7W (0.8W Standby / 0.3W Off) 8.8 / 4.4 ipm print speed. Designed for easy ink cartridge installation and replacement. Auto 2-sided printing and auto document feeder. Produce quality documents, photos and boarderless prints up to 8.5″ x 11″. 100-sheet capacity. ENERGY STAR.
1 year limited warranty. Never run out of ink or toner. Connect your printer to Alexa and receive notifications when you’re running low. Alexa can even place a smart reorder from Amazon on your behalf, if you enroll in smart reorders. Enrolling in smart reorders with Alexa ensure that you never have too much or too little ink or toner. No subscription needed. Show more › See more product detailsSKU: B09CDXKNB9 -
Canon Printers, Printer drivers, Printers & Supplies
Canon PIXMA TR8620a – All-in-One Printer Home Office|Copier|Scanner|Fax|Auto Document Feeder | Photo, Document | Airprint (R), Android, Black, Works with Alexa
 Canon Printers, Printer drivers, Printers & Supplies
Canon PIXMA TR8620a – All-in-One Printer Home Office|Copier|Scanner|Fax|Auto Document Feeder | Photo, Document | Airprint (R), Android, Black, Works with Alexa
About this item Never run out of ink. Connect your printer to Alexa and receive notifications when you’re running low. Alexa can even place a smart reorder from Amazon on your behalf, if you enroll in smart reorders Enrolling in Smart Reorders with Alexa ensures that you never have too much or too little ink supplies. No subscription needed. Wireless 4-in-1 (Print | Copy | Scan | Fax) 15 / 10 ipm Print Speed 200 Sheet Capacity (100 Cassette, 100 Rear Feed) Auto 2-Sided Printing 1,000 Page Duty Cycle
Micro SD Slot,ENERGY STAR, EPEAT Silver 1 Year Warranty Print with your voice. Just say “Alexa, discover my printer” Show more › See more product detailsSKU: B09TRZLPXP -
Epson Printers, Printer drivers, Printers & Supplies
Epson WorkForce Pro WF-3820 Wireless All-in-One Printer with Auto 2-sided Printing, 35-page ADF, 250-sheet Paper Tray and 2.7″ Color Touchscreen, Works with Alexa
 Epson Printers, Printer drivers, Printers & Supplies
Epson WorkForce Pro WF-3820 Wireless All-in-One Printer with Auto 2-sided Printing, 35-page ADF, 250-sheet Paper Tray and 2.7″ Color Touchscreen, Works with Alexa
About this item Built for speed — PrecisionCore Heat-Free Technology delivers fast, high-volume printing with 21 (black)/11 (color) ISO ppm () and fast first-page-out. High-precision printing — accurate dot placement and DURABrite Ultra instant-dry pigment inks for professional-quality prints. High-volume reliability for heavy workloads — innovative heat-free technology designed for reliability and reduced downtime. Designed for productivity — auto 2-sided printing and 1-sided, 35-page ADF streamline workflow. Maximize efficiency — with large, 250-sheet paper capacity. Easy to use — 2.7″ color touchscreen for quick navigation and control, plus all-new Epson Smart Panel App (1) for enhanced connectivity and productivity from your mobile device. Convenient, wireless setup — using a smartphone or mobile device (2) with Bluetooth Low Energy (BLE); also includes built-in wireless, Wi-Fi Direct (3) and Ethernet networking.
Seamless scanning — Epson ScanSmart supports easy scanning and editing with a user-friendly interface. Comprehensive security features — including secure wireless and Secure Data Erase. Show more › See more product detailsSKU: B08DXBLK14 -
Epson Printers, Printer drivers, Printers & Supplies
Epson Workforce WF-2930 Wireless All-in-One Printer with Scan, Copy, Fax, Auto Document Feeder, Automatic 2-Sided Printing and 1.4″ Color Display
 Epson Printers, Printer drivers, Printers & Supplies
Epson Workforce WF-2930 Wireless All-in-One Printer with Scan, Copy, Fax, Auto Document Feeder, Automatic 2-Sided Printing and 1.4″ Color Display
About this item Professional-Quality Home Office Printing — Epson’s leading-edge printing technology delivers sharp text and vibrant color graphics Stress-Free Setup and Operation — Features a color display for effortless navigation, plus easy installation and operation through your smartphone or tablet using the Epson Smart Panel app (1) Engineered for Reliability — Consistently delivers high-quality prints with heat-free technology and a permanent printhead designed to last the life of the printer Convenient Connectivity — Supports easy wireless connections and printing from Android or iOS devices (2) Efficient, Economical Design — Automatic 2-sided printing helps you save paper and reduce paper waste Easy, Affordable Color Printing — Individual ink cartridges make it easy to only replace the ink you need Hands-Free, Voice-Activated Printing — Easily print on-the-go using Alexa, Siri and Google Assistant (3)
Versatile Functionality — Create searchable PDFs and more with included Epson ScanSmart scanning software Epson Printing System Is Designed to Be Used Exclusively with Epson Genuine Cartridges — Use of non-genuine ink could cause damage not covered under the printer’s limited warranty Show more › See more product detailsSKU: B07SXCWC74 -
Epson Printers, Printer drivers, Printers & Supplies
Epson EcoTank ET-3760 Wireless Color All-in-One Cartridge-Free Supertank Printer with Scanner, Copier and Ethernet, Regular
 Epson Printers, Printer drivers, Printers & Supplies
Epson EcoTank ET-3760 Wireless Color All-in-One Cartridge-Free Supertank Printer with Scanner, Copier and Ethernet, Regular
About this item Your busy office needs a printer that’s fast, affordable, easy to use, and has great features. That’s why we developed the EcoTank ET-3760 – an innovative cartridge-free solution that uses high-capacity, easily refillable ink tanks. So you’ll worry less about running out of ink, and save a lot on replacement ink (1). The ET-3760 features an auto document feeder, fast printing with outstanding print quality, productive paper handling, a high-resolution flatbed scanner, and a large color display – making it the perfect printer for your home office. Innovative Cartridge-Free Printing ― High-capacity ink tanks mean no more tiny, expensive ink cartridges; Epson’s exclusive EcoFit ink bottles make filling easy and worry-free Dramatic Savings on Replacement Ink ― Save up to 90% with replacement ink bottles vs. ink cartridges1 – that’s enough to print up to 7,500 pages black/6,000 color (2), equivalent to about 90 individual ink cartridges (3) Stress-Free Printing — Up to 2 years of ink in the box (4) – and with every replacement ink set – for fewer out of ink frustrations Zero Cartridge Waste – By using an EcoTank printer, you can help reduce the amount of cartridge waste ending up in landfills Impressive Print Quality ― Unique PrecisionCore Heat-Free Technology and Claria ET pigment black ink produce extremely sharp text – plus impressive color photos and graphics – on virtually any paper type Robust Paper Handling ― Auto Document Feeder, paper-saving auto 2-sided printing and a 250-sheet paper tray for high productivity
Built-in Scanner and Copier ― High-resolution flatbed scanner and a 2.4″ color display for easy document copying and navigation Modern Connectivity ― Features Ethernet and wireless, plus hands-free voice-activated printing (5). Easily print from your smart device (6) with the intuitive Epson Smart Panel App (7) Show more › See more product detailsSKU: B07NK8PM4D